🚨 Pre-order the Model O now—quantities are limited! 🌱 Shipping starts February 2025. 👉
Using co2.click cloud enabled sensors with HomeAssistant using the cloud API
Did you know that co2.click Model C can be integrated with HomeAssistant ? It's actually pretty simple and relies on the data Model C sends to the cloud portal periodically.
Tu add your co2.click Model C to your HomeAssistant server simply use the following YAML in the configuration.yaml configuration file:
rest:
resource: https://environment-monitor-01.co2.click:11000/api/v1/sensor?uuid=YOUR_SENSOR_UUID&viewToken=YOUR_SENSOR_TOKEN
sensor:
- name: "Model C CO2"
unique_id: a74e63a8-6312-4d72-aeef-152fd21af0c3
value_template: "{{ value_json.lastSampleCo2 }}"
unit_of_measurement: "ppm"
device_class: carbon_dioxide
- name: "Model C Temperature"
unique_id: 887856eb-04e0-4858-a268-8af74979a486
value_template: "{{ value_json.lastSampleTemperature }}"
unit_of_measurement: "°C"
device_class: temperature
- name: "Model C Humidity"
unique_id: b479e1a4-8c64-4a33-a3e6-e56e633320ee
value_template: "{{ value_json.lastSampleHumidity }}"
unit_of_measurement: "%R.H."
device_class: humidity
Replace YOUR_SENSOR_UUID with your sensor UUID (Wi-Fi MAC address) and YOUR_SENSOR_TOKEN by the unique token. This token can be obtained from the portal by clicking the "Public view" icon: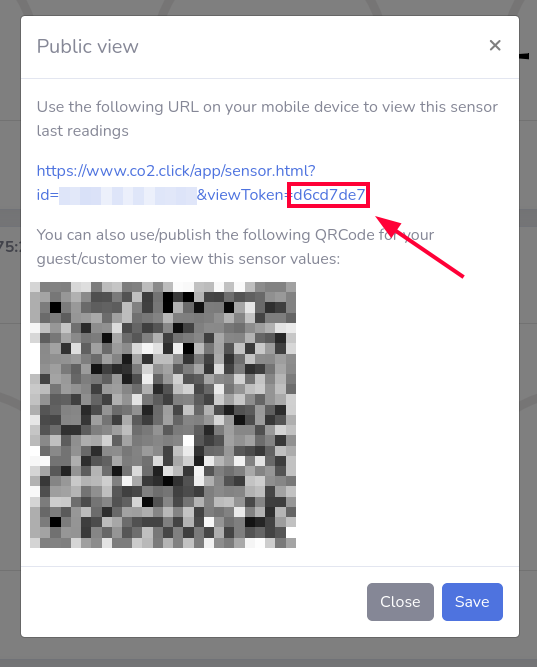
Then in your HomeAssistand WebUI go to the "Developer Tools" and Click on "CHECK CONFIGURATION" to ensure that the configuration you added is valid:
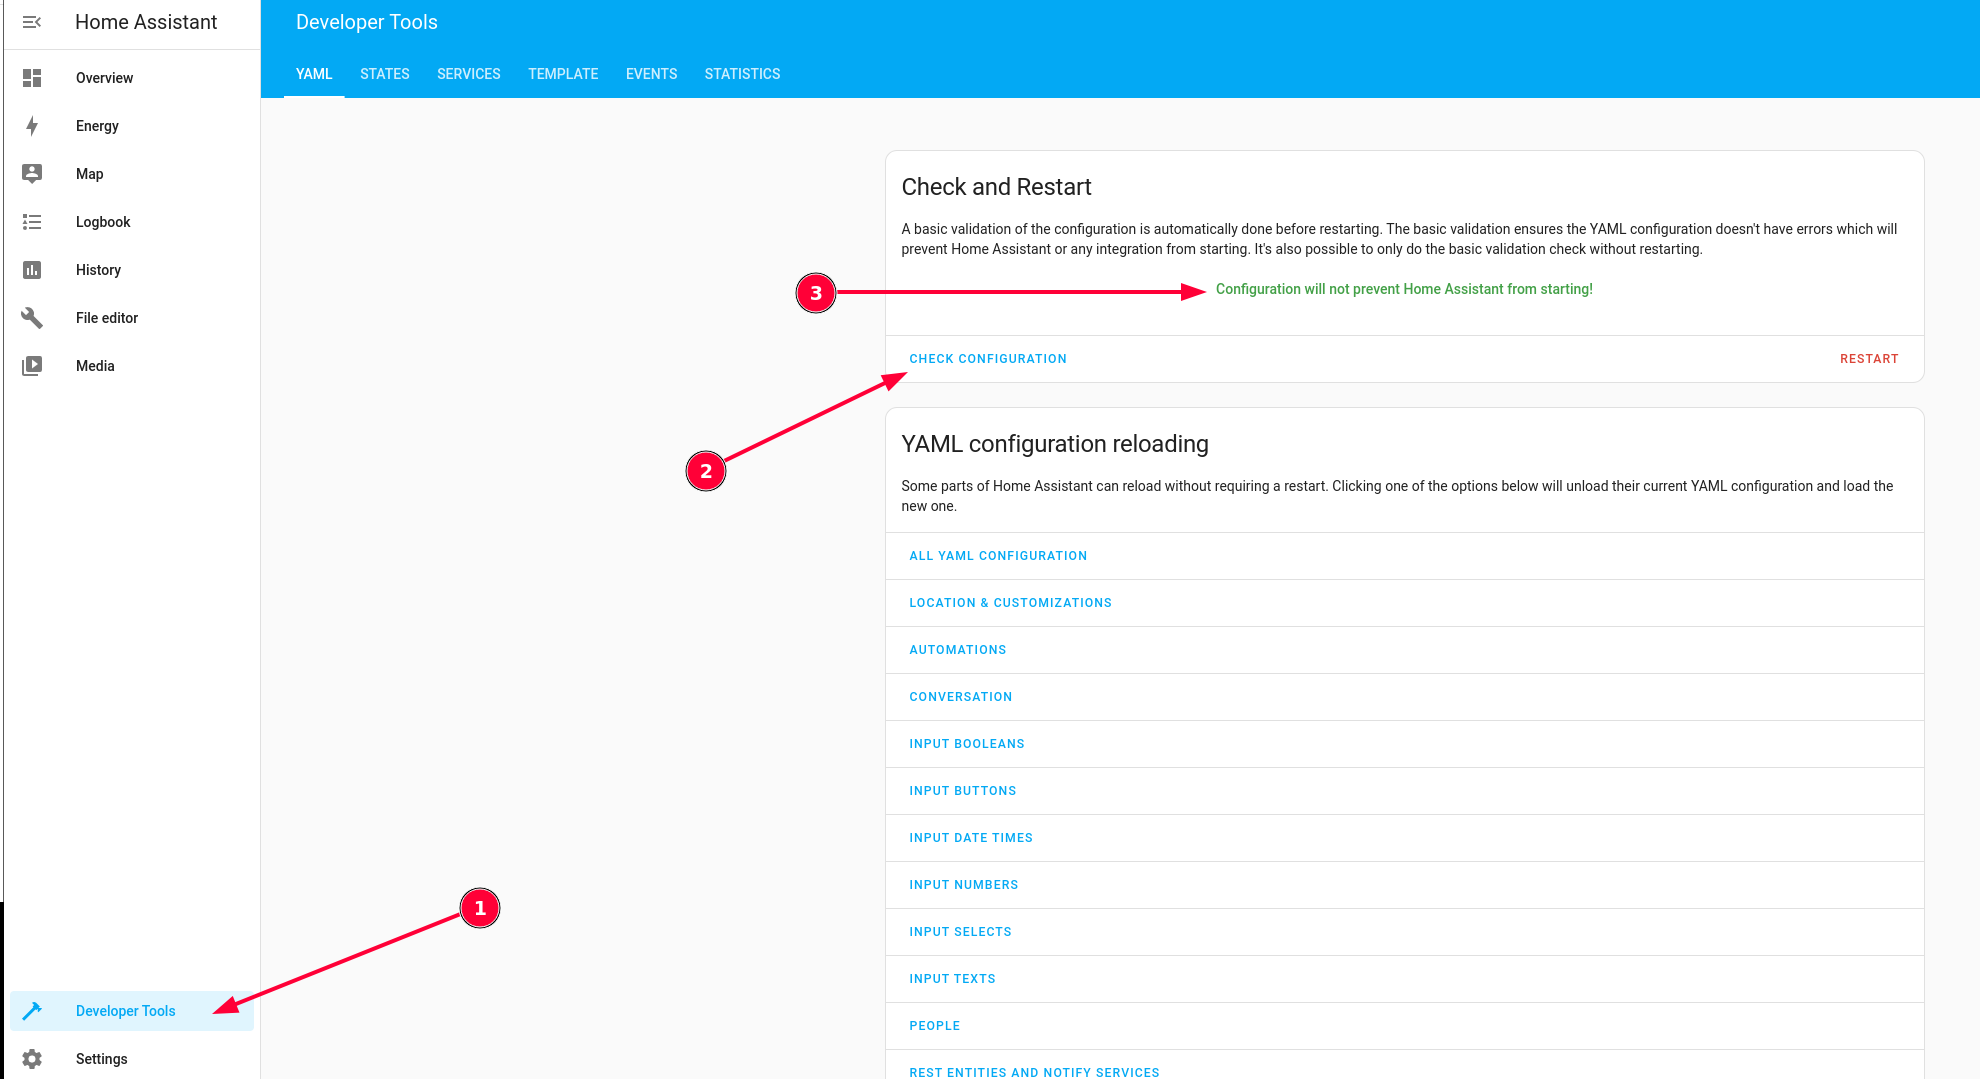
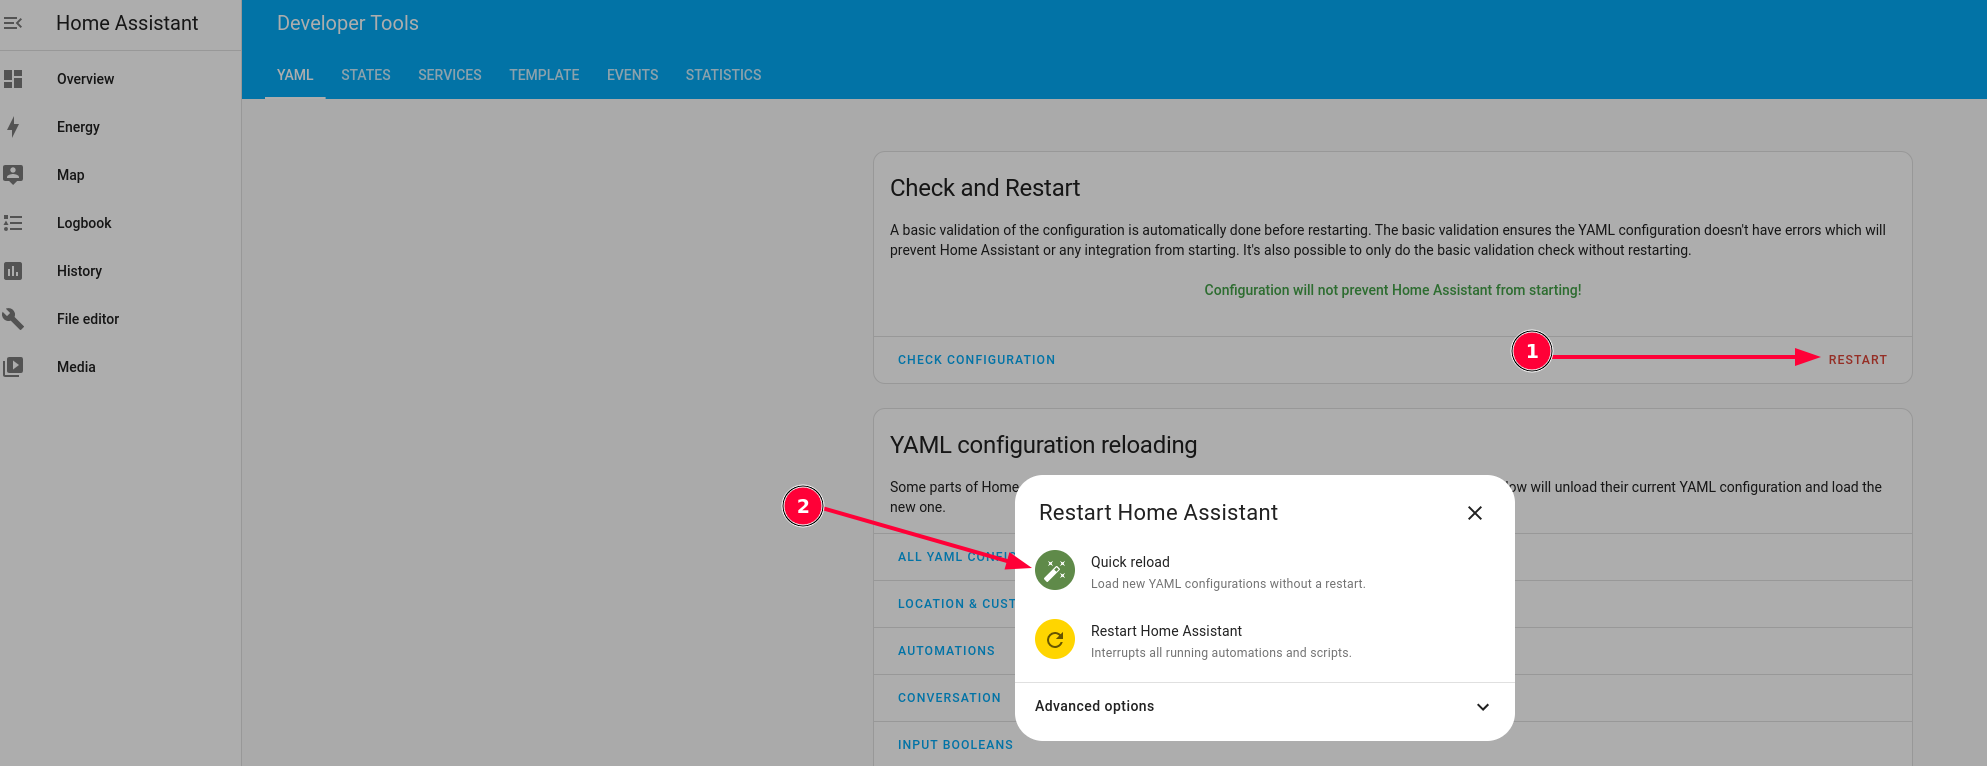
If everything is ok, you can click on "RESTART" and select "Quick Reload"
The next step is to allocate a zone/area to the sensor data. For this Click on "Settings" and then "Devices and services"
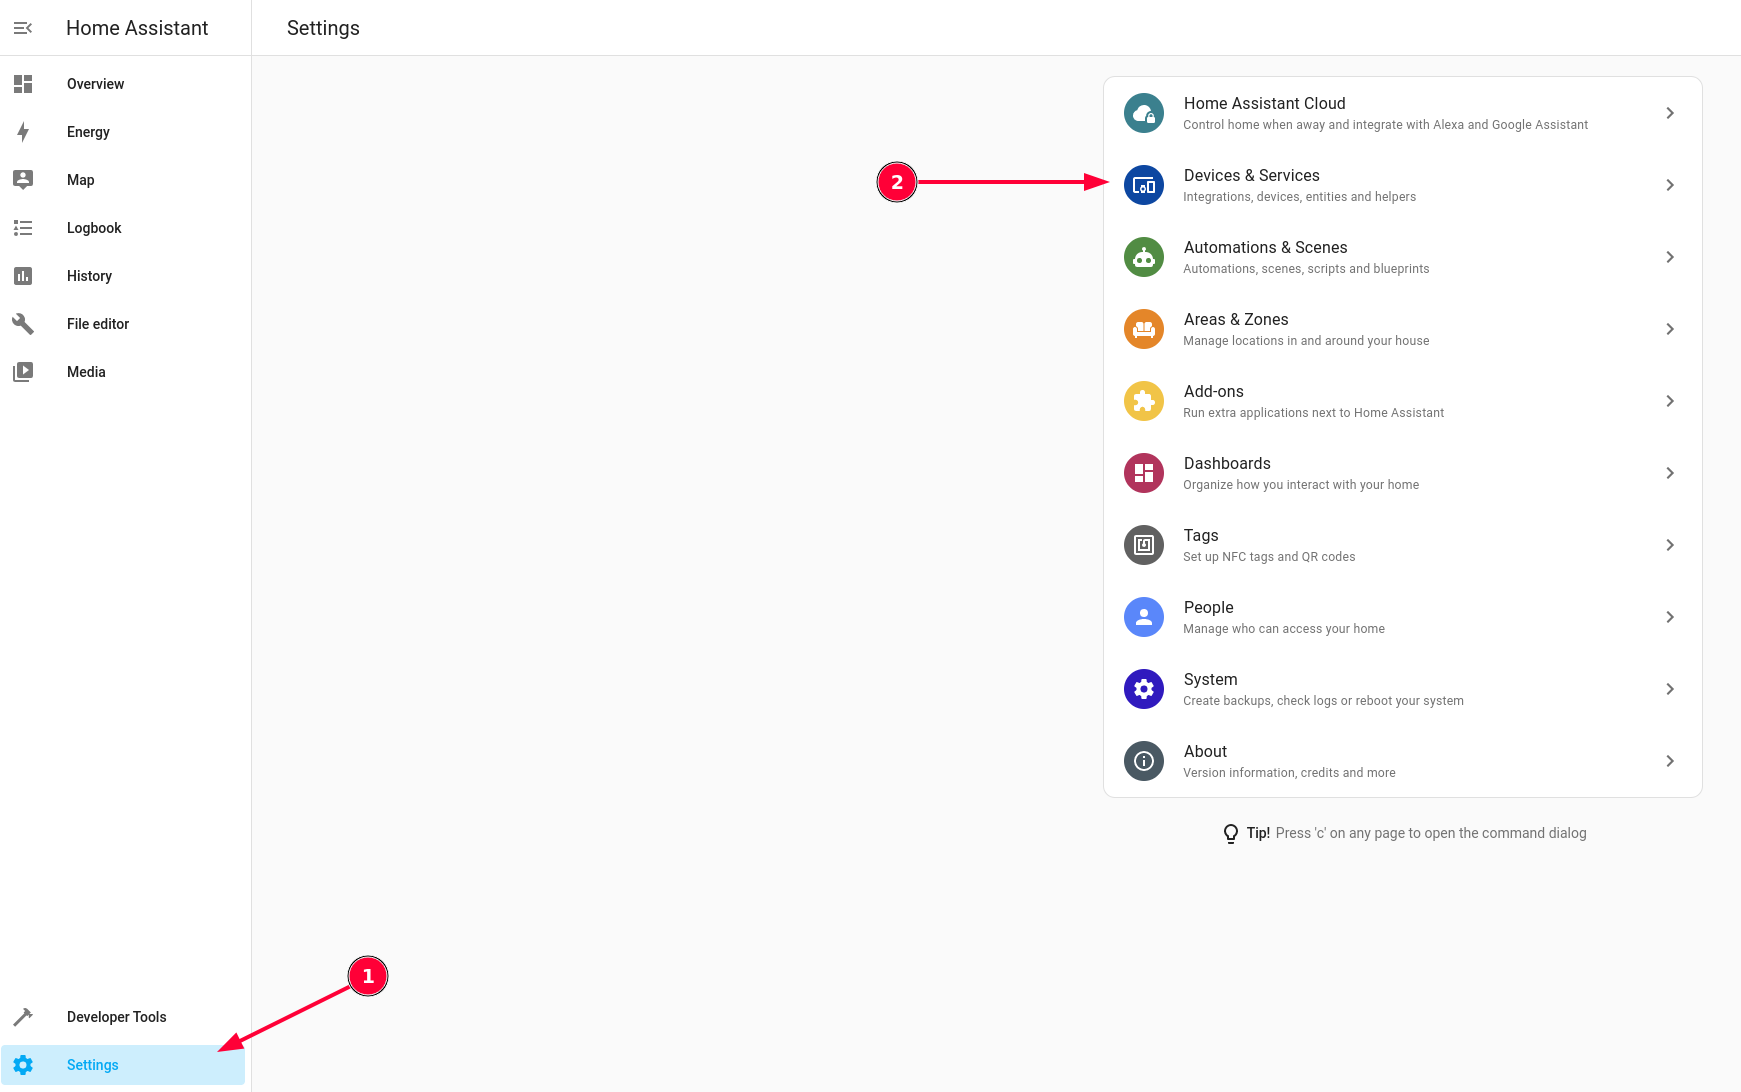
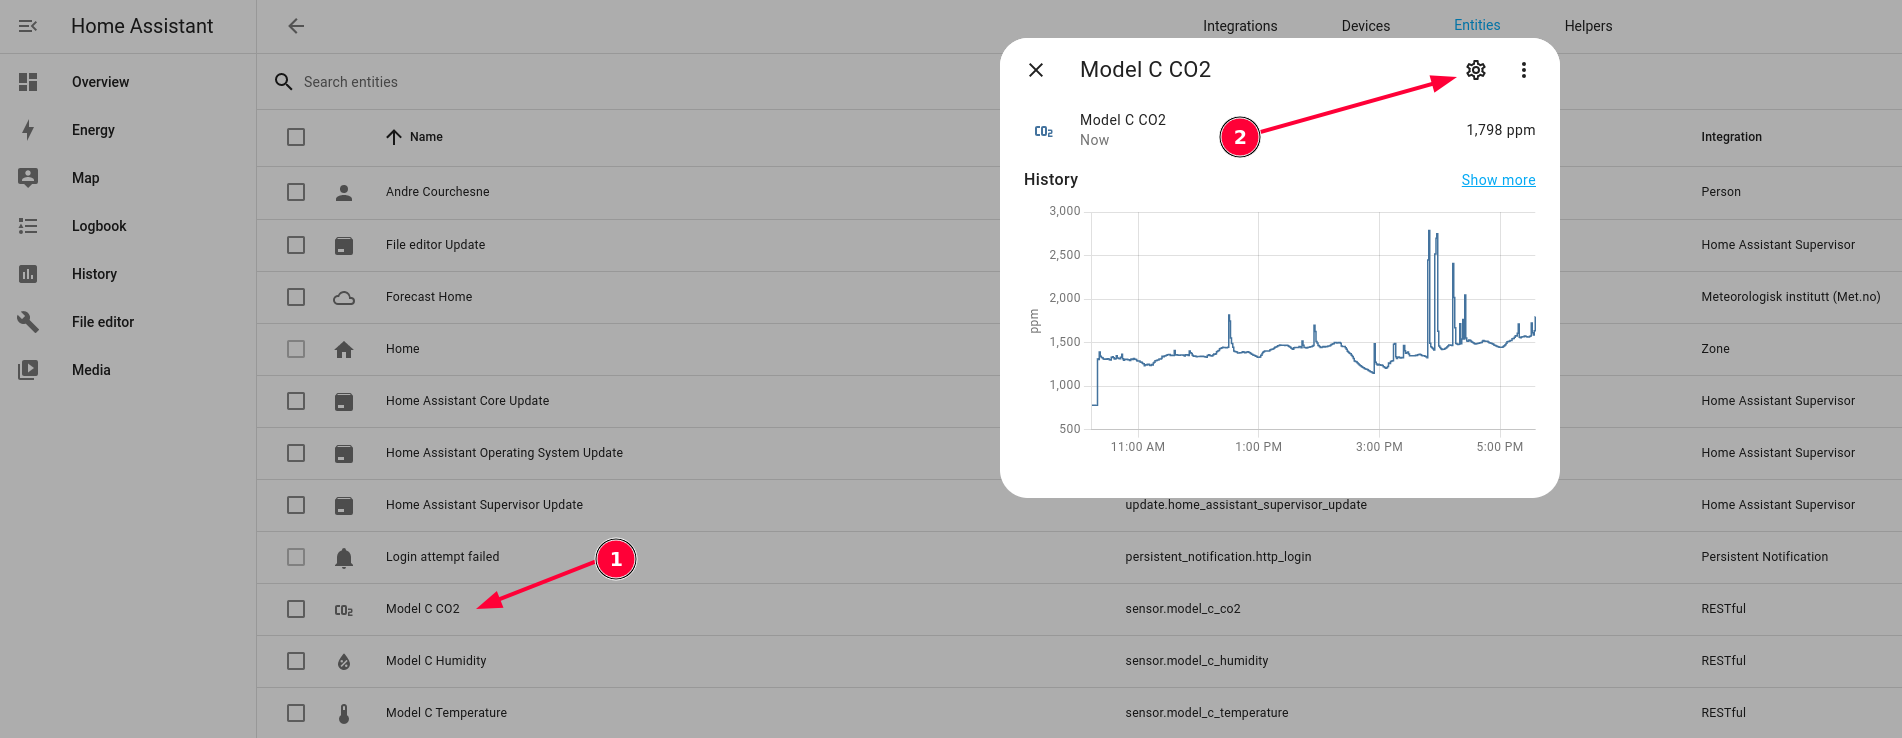
At the top click on "Entities" and you should see the sensor data available:

Click on each and then on the "gear" icon
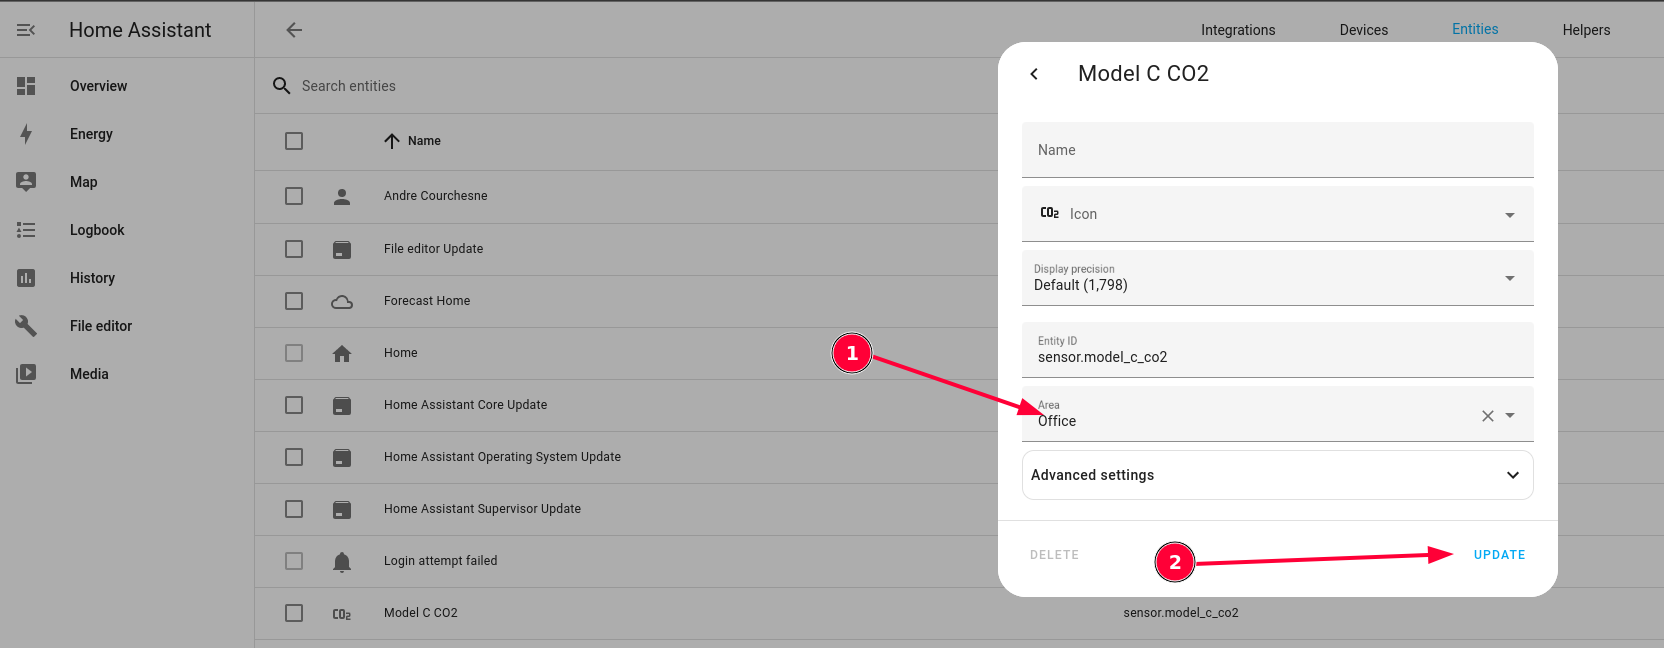
Then select an area and click on "Update"
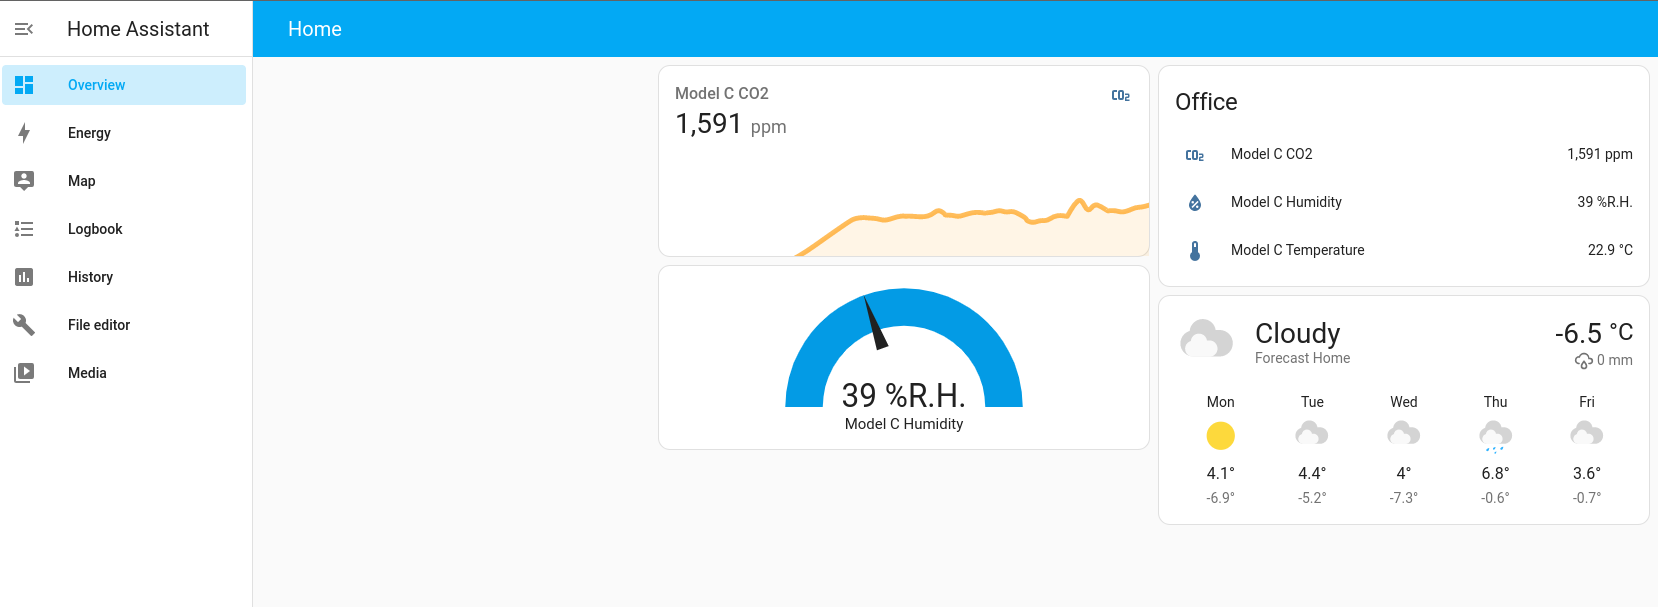
Your sensor values should now show in your dashboard for the area/zone you selected. You can also add graphs and gauges like shown below:
Note that your sensor must be connected to a Wi-Fi network, have internet access and be properly configured in the portal for your HomeAssistant server to be able to fetch the data.
Display prices in:CAD
